0

Chocolate Fudge cake

IMG_2498

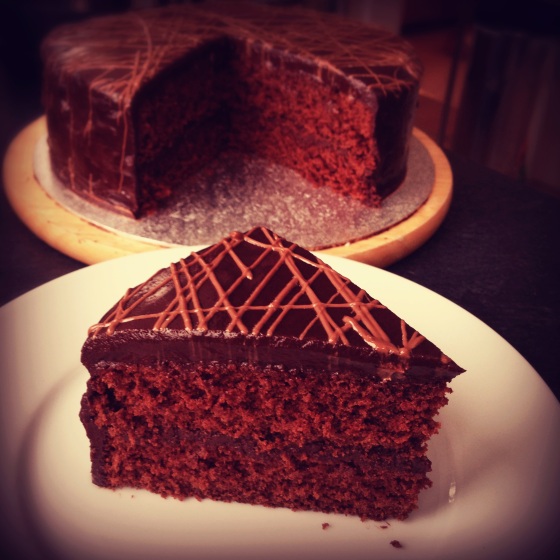
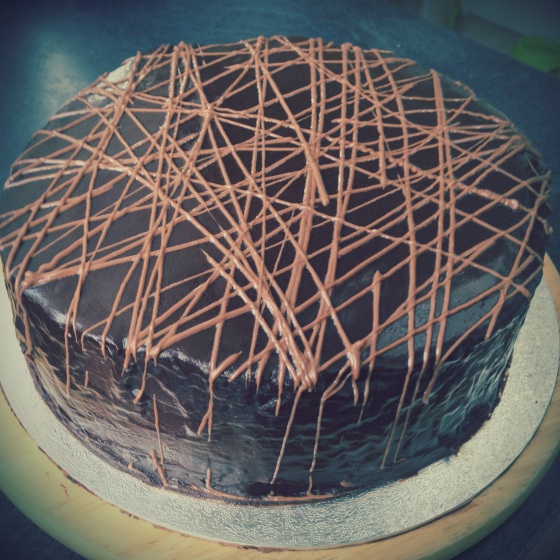
Apologies for yet ANOTHER chocolate cake. However unlike the previous bakes this one was for ME and ME alone. (Sort of. I don’t really want to be obese). But the point is I’ve been making cakes for other people and quite frankly I’ve had a serious case of cake envy. I can’t eat other people’s cakes. It’s wrong. It’s also depressing. Chocolate cake is not my most favourite cake in the world, but those last two had left me craving it. The recipe came from the mighty Mary Berry (recipe below), and it did not disappoint. It’s basically two chocolate sponges sandwiched together with ganache. I considered making a chocolate buttercream icing but in the end went for ganache. Just because I wanted it all shiny and pretty like. But the shiny ganache only makes a thin layer of icing so I made the thick type of ganache, slathered that on, and then poured over the thin shiny stuff. Details of how below.

Ingredients

  • 50 g (2 oz) sifted cocoa powder
  • 6 tablespoons boiling water
  • 3 large eggs
  • 50 ml (2 fl oz) milk
  • 175 g (6 oz) self-raising flour
  • 1 rounded teaspoon baking powder
  • 100 g (4 oz) softened butter
  • 275 g (10 oz) caster sugar

FOR THE ICING AND FILLING

  • 3 tablespoons apricot jam
  • 150 g (5 oz) plain chocolate*
  • 150 ml (¼ pint) double cream*

*I made double the amount of icing as I wanted shed loads. But it’s not that necessary. Unless you are a pig. Like me.

Method

  • Pre-heat the oven to 180°C/Fan 160°C/Gas 4. Grease two 20 cm (8 in) deep sandwich tins then line the base of each tin with baking parchment.
  • Blend the cocoa and boiling water in a large bowl then add the remaining cake ingredients and beat until the mixture has become a smooth, thickish batter. Divide the cake mix equally between the prepared tins and level the surface.
  • Bake in the pre-heated oven for about 25–30 minutes or until well risen and the tops of the cakes spring back when lightly pressed with a finger. Leave to cool in the tins for a few minutes then turn out, peel off the parchment and finish cooling on a wire rack.
  • To make the icing, warm the apricot jam in a very small pan, then spread a little over the base of one cake and the top of the other. Break the chocolate into pieces and gently heat with the cream in a heatproof bowl set over a pan of simmering water for about 10 minutes or just until the chocolate has melted, stirring occasionally.
  • Remove the bowl from the heat and stir the chocolate mixture to make sure it has completely melted. Leave to cool until it is on the point of setting then spread on top of the apricot on both cakes. Sandwich the cakes together and use a small palette knife to smooth the icing on the top.

So the ganache at this thickened stage is not particularly shiny. I had some left (ok maybe doubling the amount was a bit ambitious) so decided to get my shine on. Word of warning: what I am about to tell you is a semi-failure, so don’t try this at home. I reheated the ganache. It went all smooth and shiny and gloopy. I poured it on the cake. I watched with wonder as it cascaded in a chocolatey waterfall. And continued to watch it as it separated. Oops. The fat and chocolate were friends no more. It’s no great tragedy when it’s just for a cake for yourself as from a distance it still looks great and tastes great too. But close up, well it looked like tiny brown iron fillings under a layer of oil. Sounds gross but it wasn’t that bad. I guess you can’t reheat ganache? I’m sure I read that you can but somewhere along the line I went wrong. No matter. And also the fact I’d poured it over a not perfectly smooth icing meant it looked rather bumpy, especially down the sides which you can see in the pic below. So to disguise this cock-up I melted some milk chocolate and piped random lines in a sort of kind of artistic way. It did the trick though. I thought it looked great! And the taste? YUM. It’s not a particularly sweet cake as ganache is very bitter. But I really loved it. And no I didn’t eat it all myself. My family had a hunk and the rest I dished out at work too much appreciation. I will most definitely make it again.

Sasa

IMG_2485

0

Digger cake

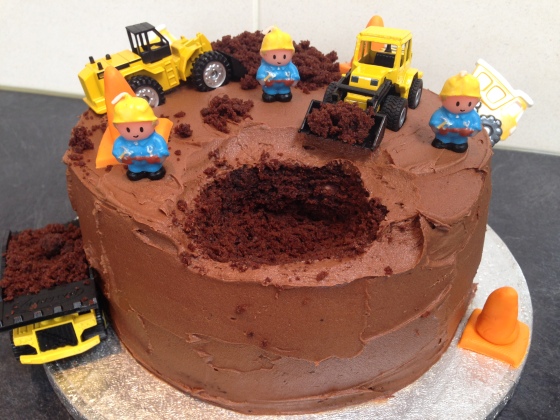
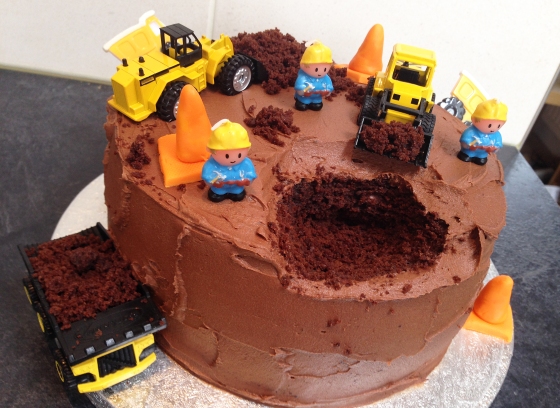
I was recently asked to make a birthday cake for a three year old. I could hardly refuse. ‘Because you don’t want to let a little boy down?’ you might ask. Not so. Because it was asked of me by my boss. How could I refuse? Seriously, the man pays my wages. So we scheduled in a board meeting (or something less formal) to discuss a theme. What does your boy like? Seems diggers and trucks is his thing. Riiiiight… Okaaaay… I have no idea about such things but I’m guessing no glitter. Shame. So I typed ‘digger cake’ into the oracle (google), got some inspiration and set to work. This is what I ended up with:

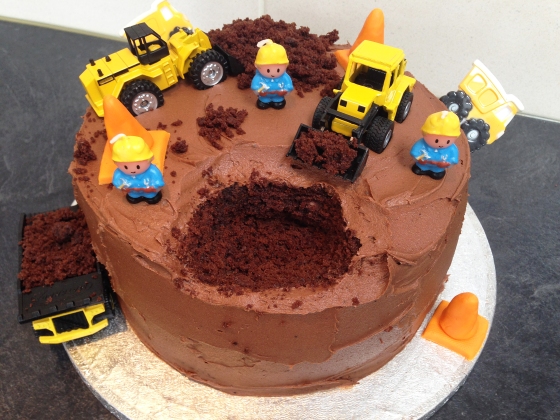
IMG_2391As you can see its a chocolate cake and is covered in chocolate buttercream icing. (Recipe below). The diggers and trucks were the birthday boys own (stolen right from under his unsuspecting nose by his own father. With good intentions of course). I managed to buy the little workmen candles from a cake shop and, as I’m sure you can tell, I made the traffic cones by hand with Sugarpaste (Rollout Icing). They were quite tricky, at one point they looked like wizards hats. But I think they turned out ok in the end. They look like traffic cones don’t they? DON’T THEY?!?!?!?!?

Ingredients:

  • 50g dark chocolate, melted and allowed to cool slightly
  • 250g butter, at room temperature
  • 250g light muscovado sugar
  • ½ tsp salt
  • 100g cocoa powder
  • 250g plain flour
  • 2 tsp baking powder
  • 3 large eggs
  • 250ml milk
  • 50g chocolate chips

For the buttercream:

  • 140g butter, softened
  • 50g cocoa powder
  • 200g icing sugar
  • 2 tbsp milk

Method:

  1. Grease and line the bases of 2 x 20cm springform cake tins with greaseproof paper. Preheat the oven to 180C (160C fan) 350F / gas 4. Cream together the butter and sugar with ½ tsp salt until light and fluffy.
  2. Sift together the cocoa, flour and baking powder. Add the eggs to the butter mixture one at a time and beat until well combined, then fold in half the dry ingredients followed by the melted chocolate. Fold in the rest, followed by enough milk to give a soft dropping consistency, and then the chocolate chips. Divide between the two tins and bake for about 25–30 minutes until firm in the centre.
  3. Allow to cool completely on a rack, then make the buttercream. Beat the butter until fluffy, then add the cocoa, icing sugar and, if necessary, a little milk to loosen the mixture. Put one of the cakes on a serving plate and spread a third of the icing on top. Place the second on top, then spread the rest of the icing over it.
  4. To decorate get a spoon and simply gauge out a hole to suggest the diggers have been doing their job… digging! Not too deep though as you don’t want to hit the buttercream centre. Keep the crumbs but remove the iced bits. Work out where you want to arrange the diggers, candles etc and then sprinkle the cake crumbs in a small area like a pile of dug up soil. Easy!
  5. To make the cones take a small piece of the sugarpaste and roll and shape with your fingers until desired shape it achieved. Mine aren’t perfect but I think that adds to the charm. That’s what I tell myself anyway… The base of the cone was created by simply rolling the paste flat with a rolling pin and cutting a square shape with a knife. Assemble and the job is done.

IMG_2390

IMG_2393Honesty corner: the main oven isn’t working (which I discovered after baking the cakes for an hour and them still being barely cooked) so I used the smaller top one. This tends to burn cakes. I knew this. And yet I still burnt them. The shame… So I got a serrated knife and cut away the offending crust. I would have done that anyway to get a flat cake so no harm done. The cake texture was super crumbly. I can’t help but wonder if that’s because of its oven switching/delayed time adventure, or if it’s some other reason I can’t think of. But it tasted nice. Very rich, possibly because of the chocolate chips? I’m not sure. I’m no Mary Berry. One day though… one day.


Sasa

2

The Beast

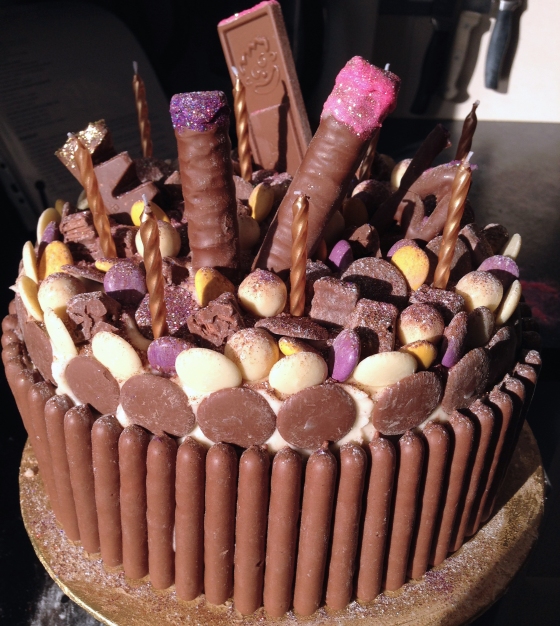
My brothers girlfriend Lorna likes chocolate. No scrap that, she LOVES chocolate. Its obsessional. Bordering on psychotic addiction. Admit it people, we can all relate. So with her birthday looming on the horizon I knew the time had come to create the most over the top, chocolatey disgustingness of a cake. This, I knew, would be fun. So after much beard scratching and even diagrams, I came up with this:

IMG_2319

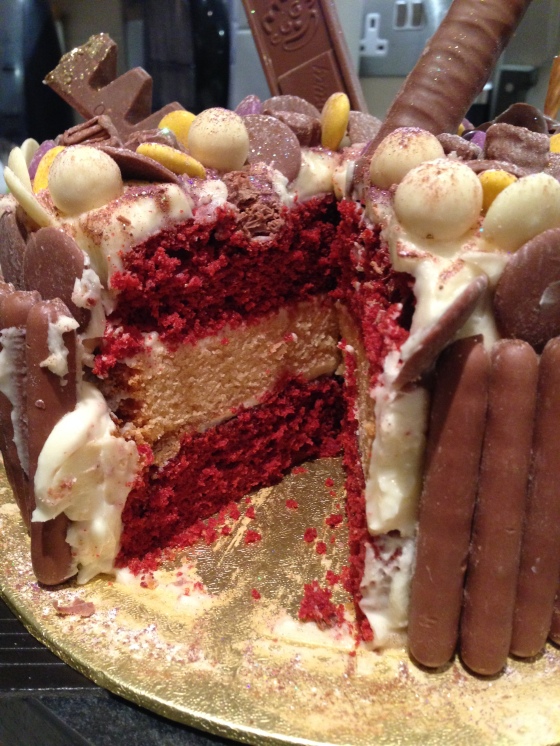
It’s actually not as outrageous as I thought it would be. But still nuts none the less. Inside its a layer of white chocolate sponge sandwiched between two layers of red velvet. All smothered with cream cheese frosting. Edge lined with chocolate fingers. Top sprinkled with white and milk chocolate Buttons, Maltersers, mini Twirls and some kind of chocolate eggs things. Then I (artfully) shoved in a Toblerone, Fudge, Twix and Curly Wurly. All finished off with a shed load of pink, gold and purple glitter. Oh yes, and then the obligatory candles (not edible, sadly). Feel sick just reading this? You should.

This cake wasn’t particularly hard to do but it was time consuming. But I like that. If I dedicate myself to a day of baking, I’m happy. Dedication. It’s what you need.

The reaction to this cake? It went something like this:

Gasping/‘OMG’ing/Squealing/Hand clapping/Hop, skip, jumping/HUGE grin that didn’t waver for about four hours.

May I just say, this is not a child. Lorna is 30 years old people. THIRTY.

Best reaction I’ve ever had to a bake and totally made it all worthwhile.

IMG_2324

There isn’t much to say on how I made it really. I took the recipes from here:

http://www.nigella.com/recipes/view/red-velvet-cupcakes
http://www.nigella.com/recipes/view/white-chocolate-mud-cake-3436

The red velvet recipe is for cupcakes but also fits into two 20cm cake tins. The white choccy cake is for one deep 20cm cake tin but I split it into two shallow tins. I only used one in the end. It would have been just too tall.

I stacked the layers with buttercream in between and then covered firstly with a crumb coating, and then a thick layer of icing. It didn’t need to look even slightly perfect as it was going to be completely covered with chocolate.

Next thing was simply to go to town with the decorating. Firstly I covered the sides with the fingers. Which annoyingly were too short! So I stuck on the giant chocolate buttons. Then i arranged all the small chocolate pieces. Then simply shoved in the longer chocolate bars. Lastly I sprinkled on the icing. Oh yes and I dipped the ends of the bars in buttercream and then glitter, just for extra glitz.

And thus the Beast was created. And t’was a Beast that the people thought she’d be eating for the rest of time… even when dry… even when mouldy… even when crawling away on the tendrils of its remaining chocolate fingers. Yet lo, Lorna was good and true and she did turn all her efforts to defeating the Beast, and the Beast did fall. And the people did gather to rejoice… and make merry, yet Lorna could not, for she was in a diabetic coma.

The end.

Sasa